How To Create A Subscriber?
Updated on 06 Mar, 2024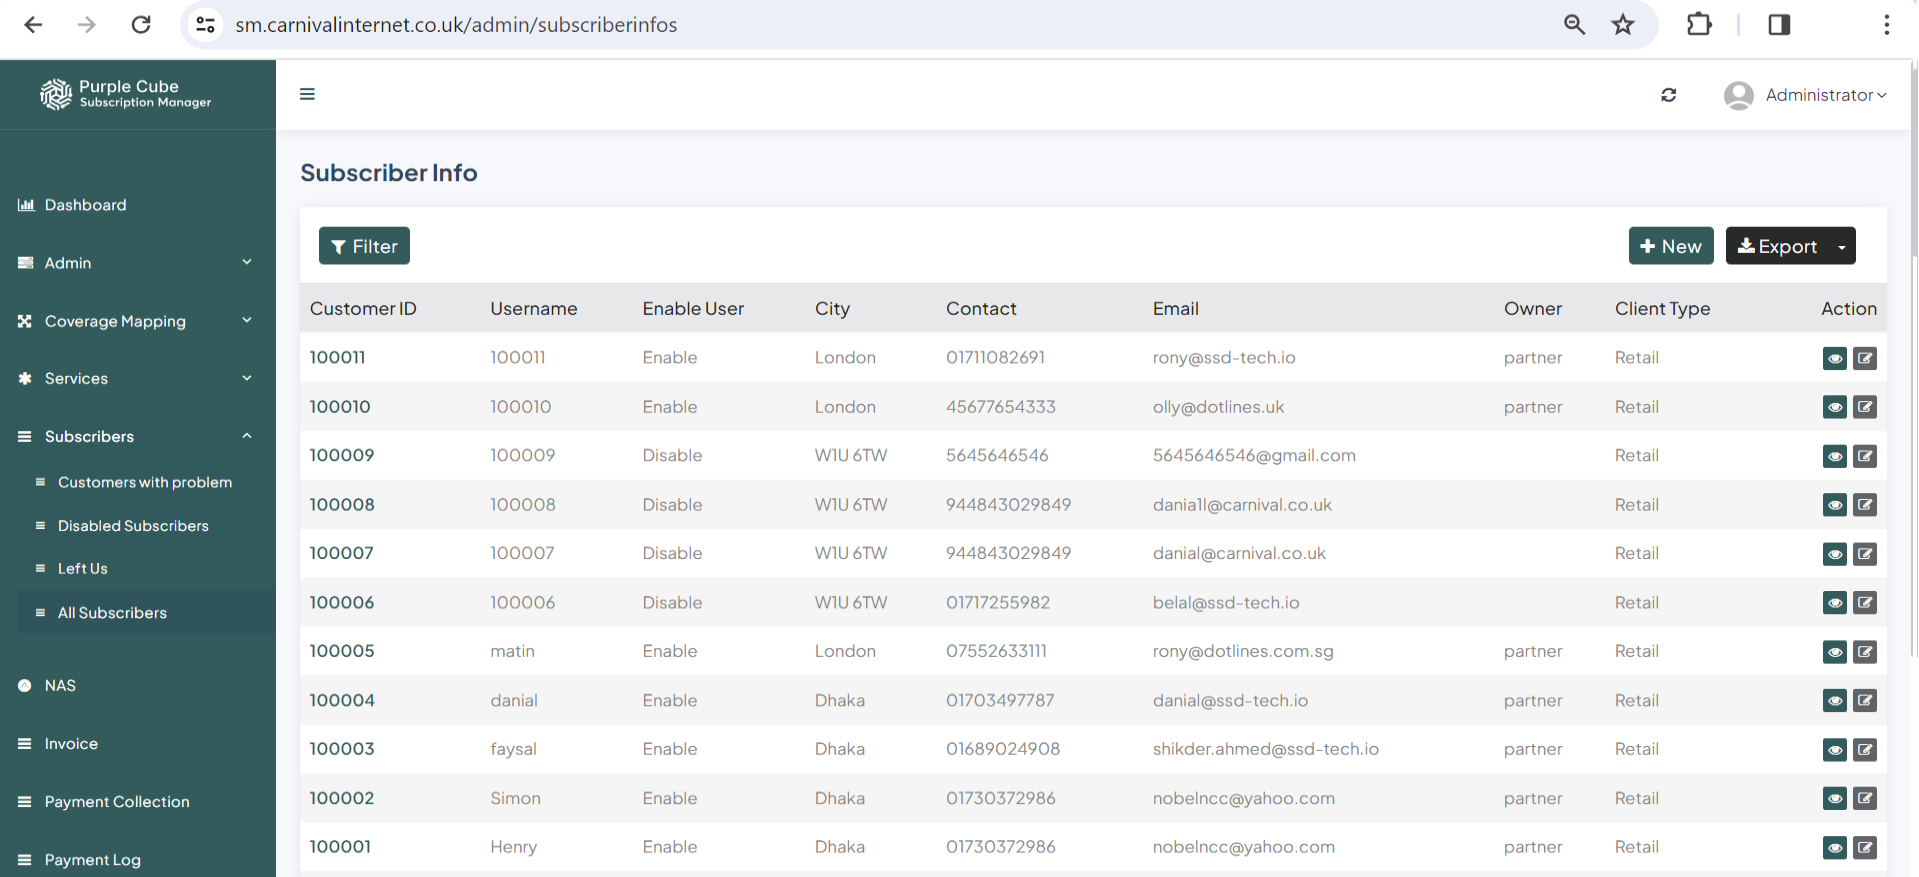
1. Go Subscribers> All Subscribers
2.A list of every subscriber(the source of these list are CRM, SM, Parner Portal and Website to sell service/product), including their customer ID, username (which will match their customer ID if they created their account on the official website where the product or service is being sold), city, contact information, email address, owner (partner or not), and client type (data can be exported in.csv format if needed).Click +New to insert a new subscriber
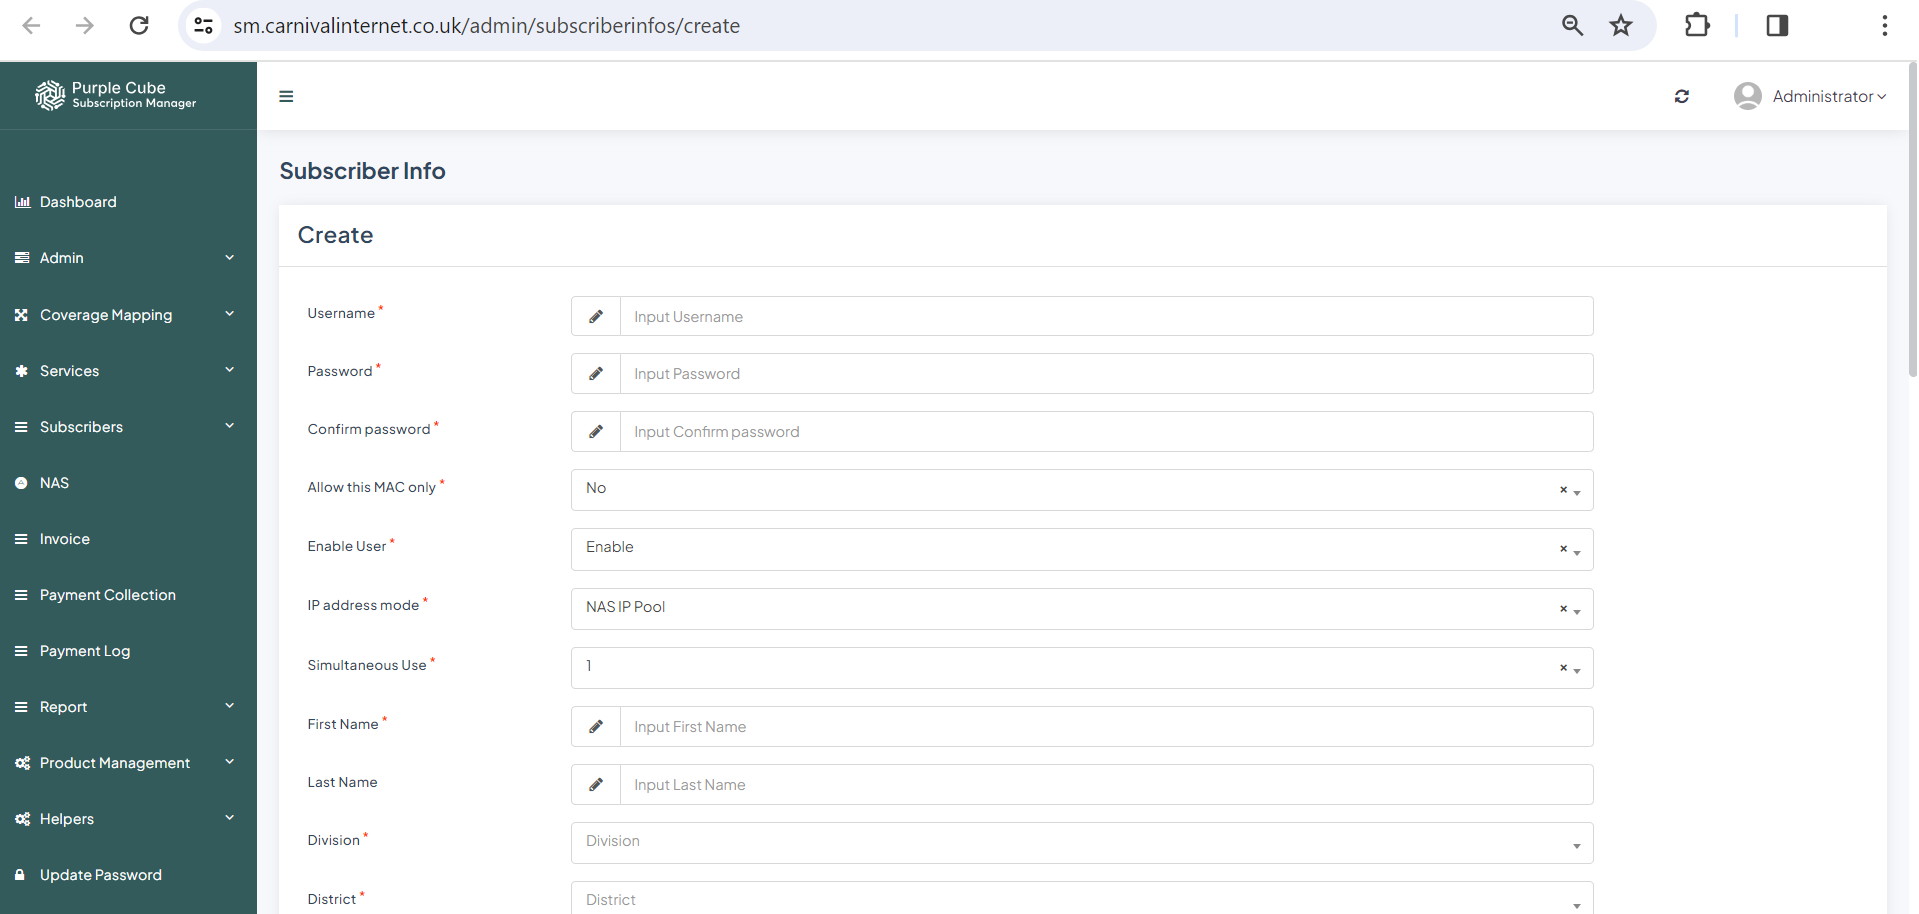
3. Provide your username, password, and confirmation. Select whether to allow this MAC only (yes or no), enable users (enabled or disabled), use IP address mode (NAS IP pool/static pool), allow simultaneous use (1/2), first and last names, division (e.g., province), district (e.g., county), address, contact, additional contact, email, total limit (in MB), zone, distribution office, POP (internet access point), owner, client type, client state, service plan, contract start date, contract end date, contract renewal date, and comment (if any). Click Submit
(a) To obtain a filtered list of all subscribers who have difficulties- Go Subscribers> Customers with problem
(b) To access a filtered list of all subscribers whom we deactivated- Go Subscribers> Disabled Subscribers
(c) To acquire a filtered list of all subscribers who departed us- Go Subscribers> Left Us
Did this article help?