How To Configure A Server?
Updated on 21 Apr, 2024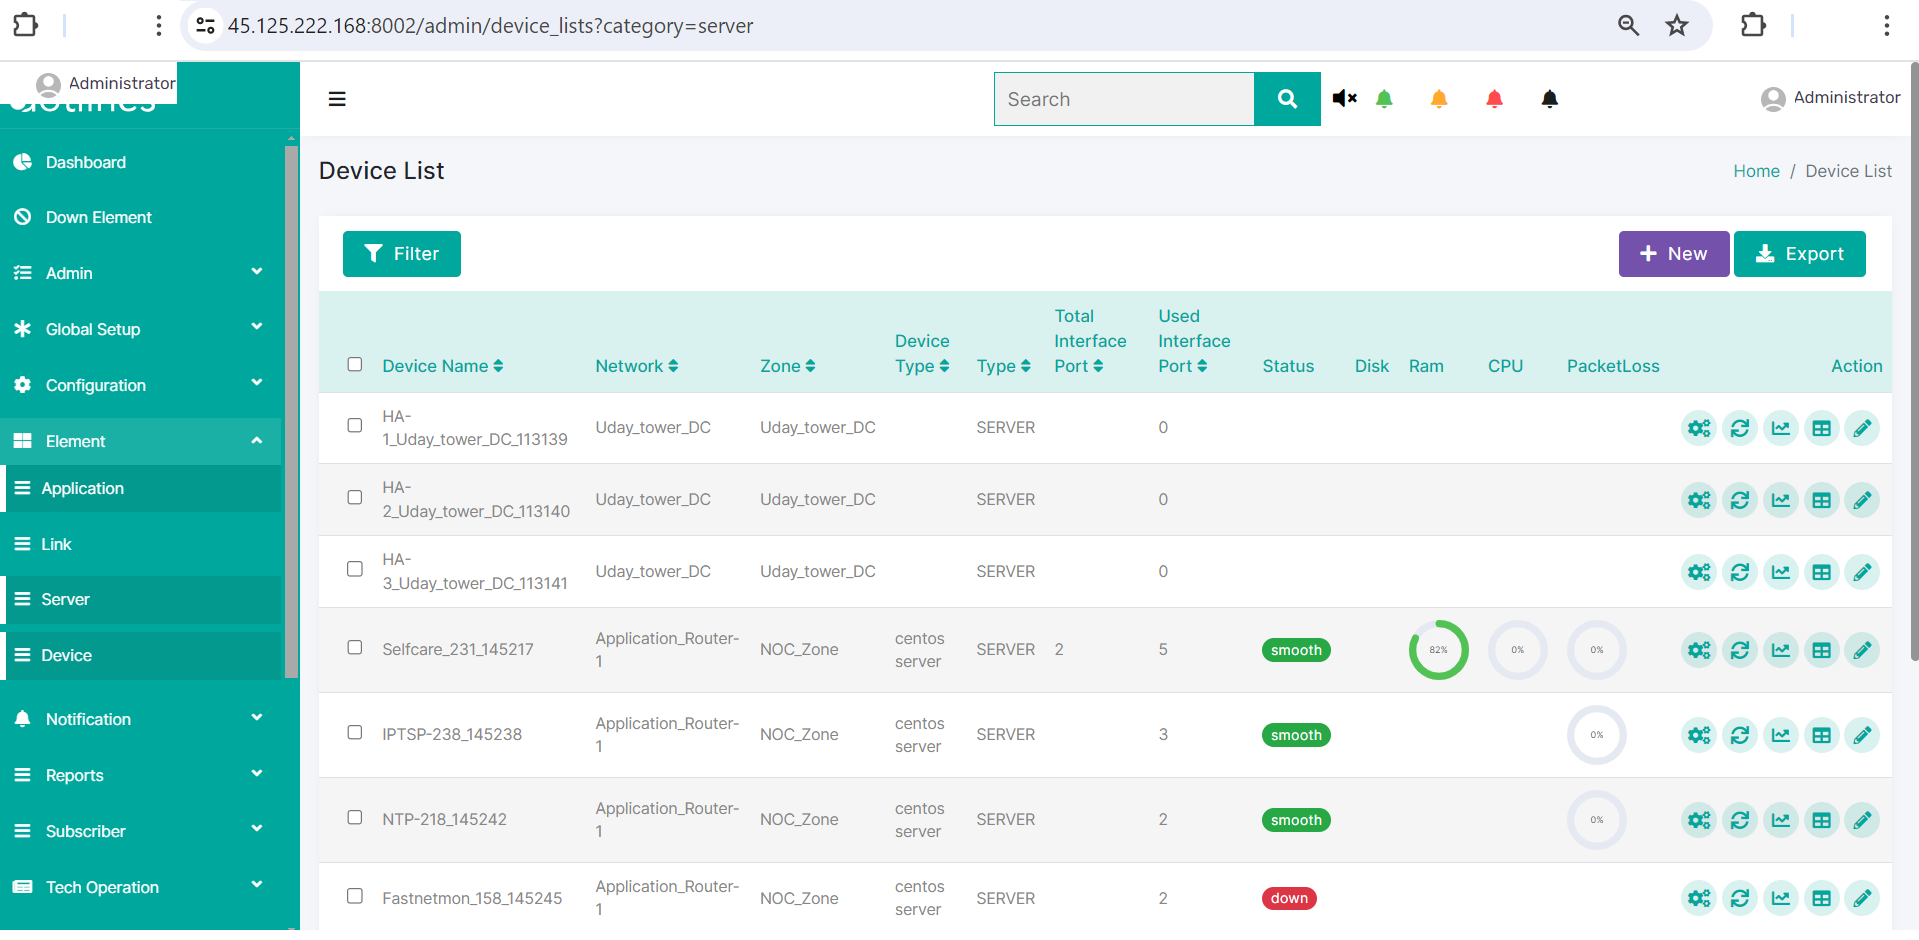
1. Go Element> Server
2.A list of server will be displayed, together with their Device Name(e.g., Selfcare_231_145217),Network(e.g., Application_Router-1),Zone(e.g., NOC_Zone),Device Type(e.g., centos server),Type(e.g., SERVER),Total Interface Port,Used Interface Port,Status,Disk(%),Ram(%),CPU(%) and PacketLoss(%). If the status remains alert or down, the email will be escalated to the appropriate group. This data can be exported in.csv format if needed. Click +New to insert a server.
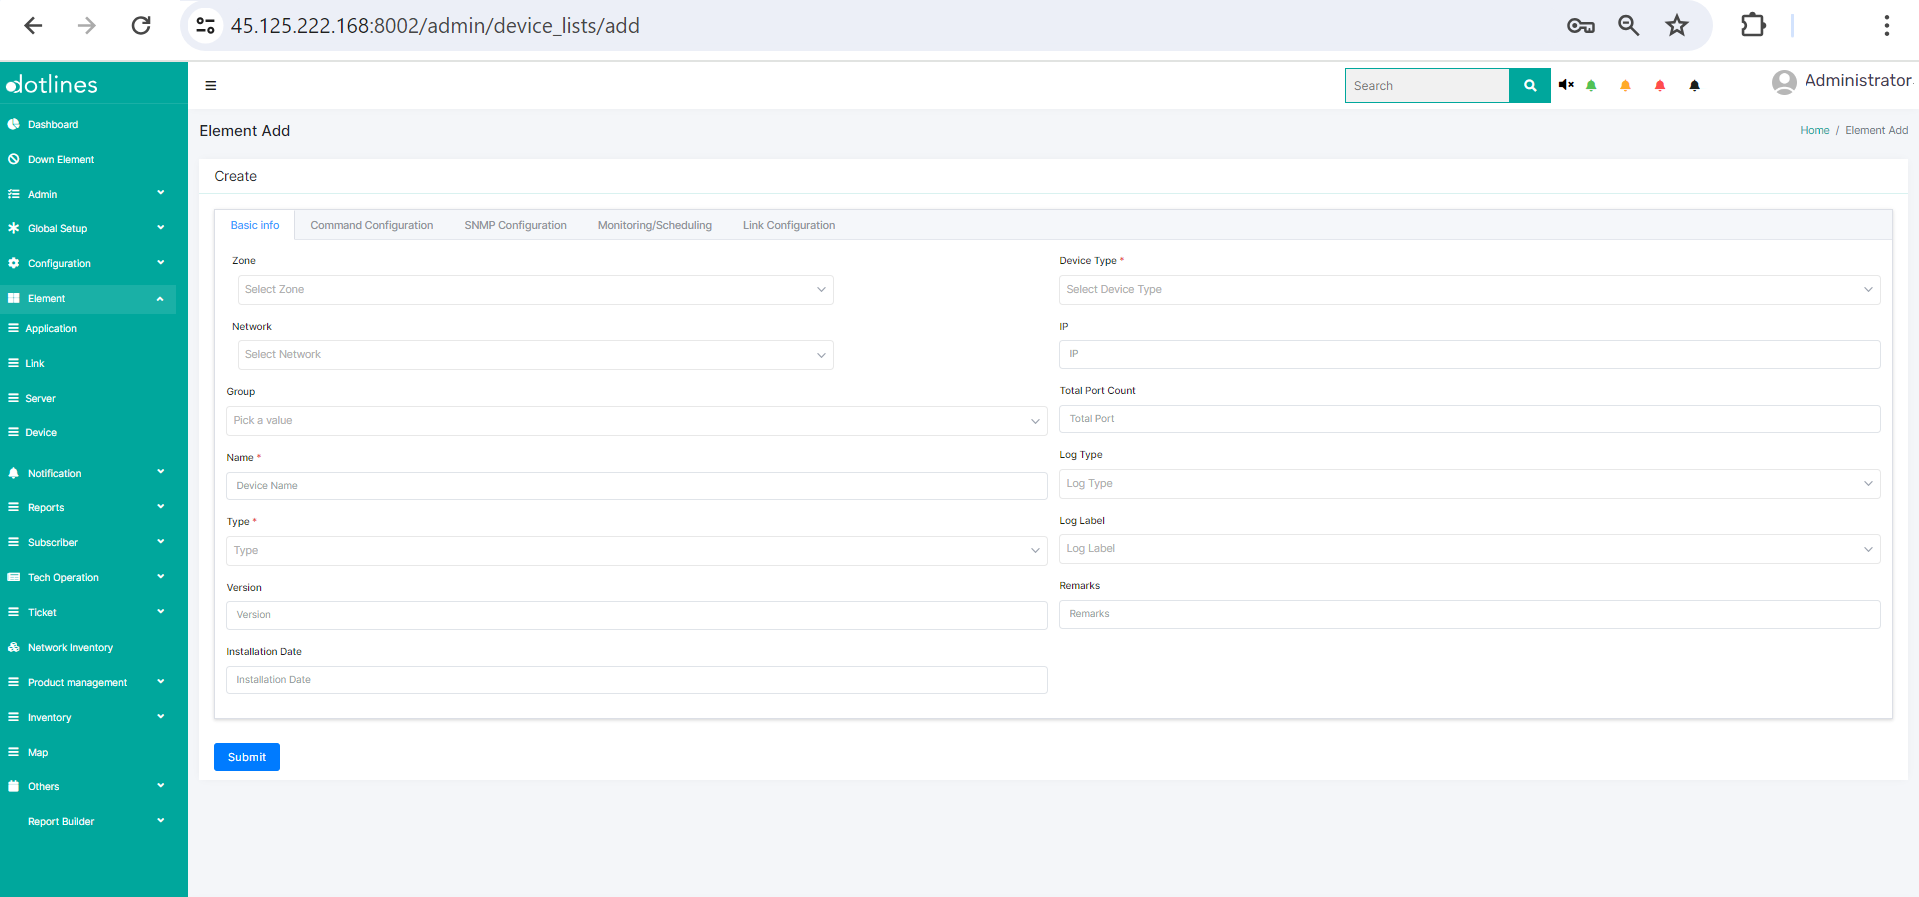
3. Under Basic info, put Zone(zone identifier),Network(network identifier),Group(group identifier), name(device's application name),Type(Type of element, e.g., Application), Version(if any), Installation Date, Device Type,IP, Total Port Count, Log Type, Log Label and Remarks.
4. Under Command Configuration, put command template, login type, login delay, port, username, password, command execution template, multiple command delay.
5. Under SNMP configuration, put SNMP Template, version, community string and port.
6. Under Monitoring/ Scheduling, select Monitoring Template, separate monitoring thread, enable monitoring notification and enable monitoring time.
7. Under Link configuration, click +New to add Link Name, Target device, link type, Monitoring method(e.g., command, snmp, api) and monitoring interval(in seconds).
Click Submit
Did this article help?