How Can Users Be Created And Maintained Within The System?
Updated on 25 Nov, 2024To add a fresh new user, follow the steps below:
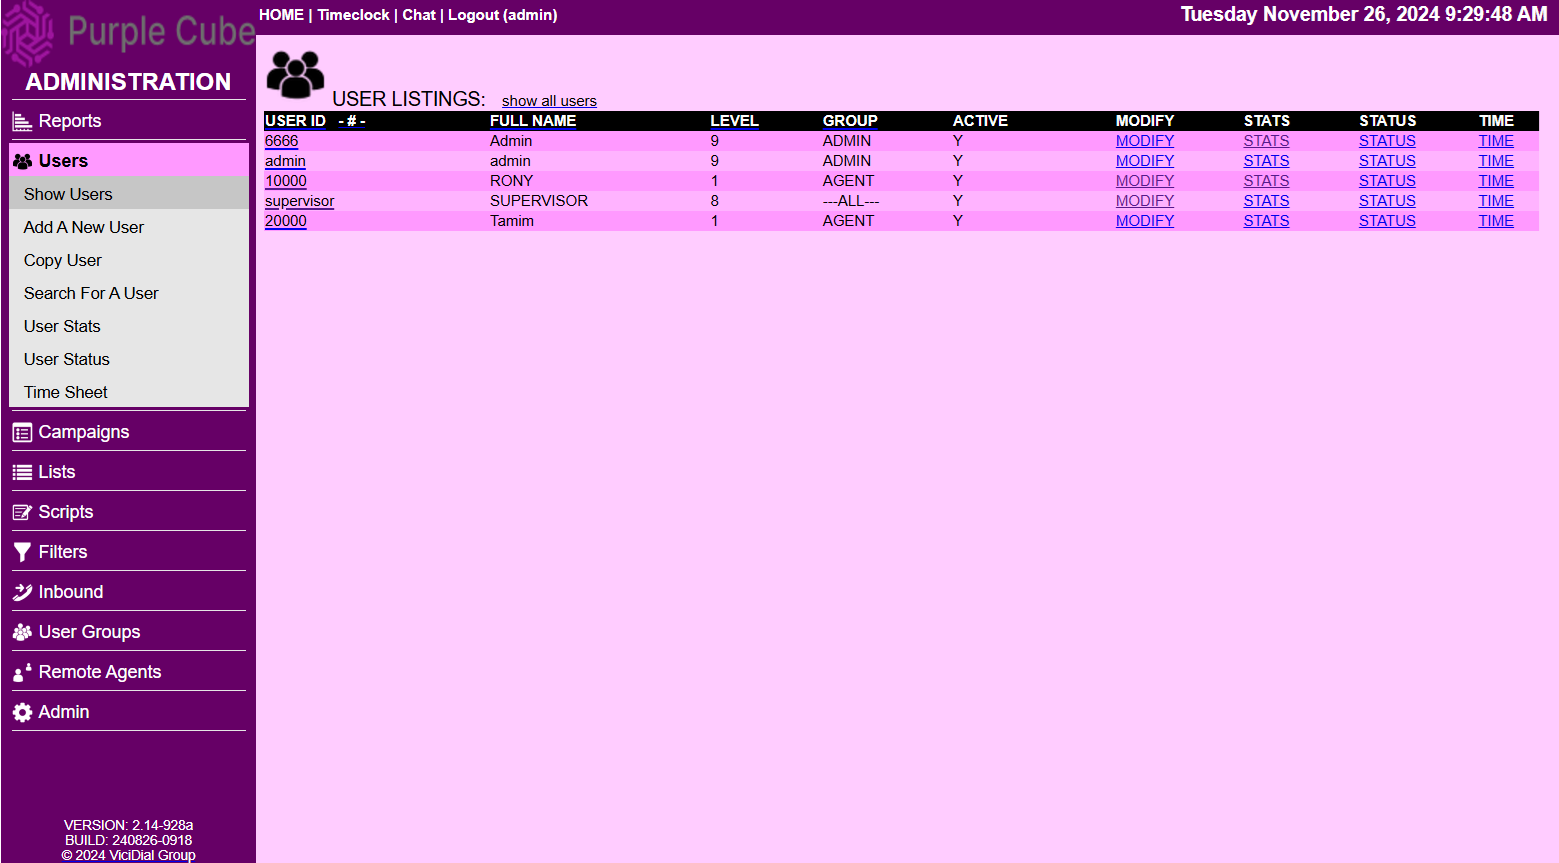 1. Navigate to the Users section from the main menu.
2. Select the Add A New User submenu.
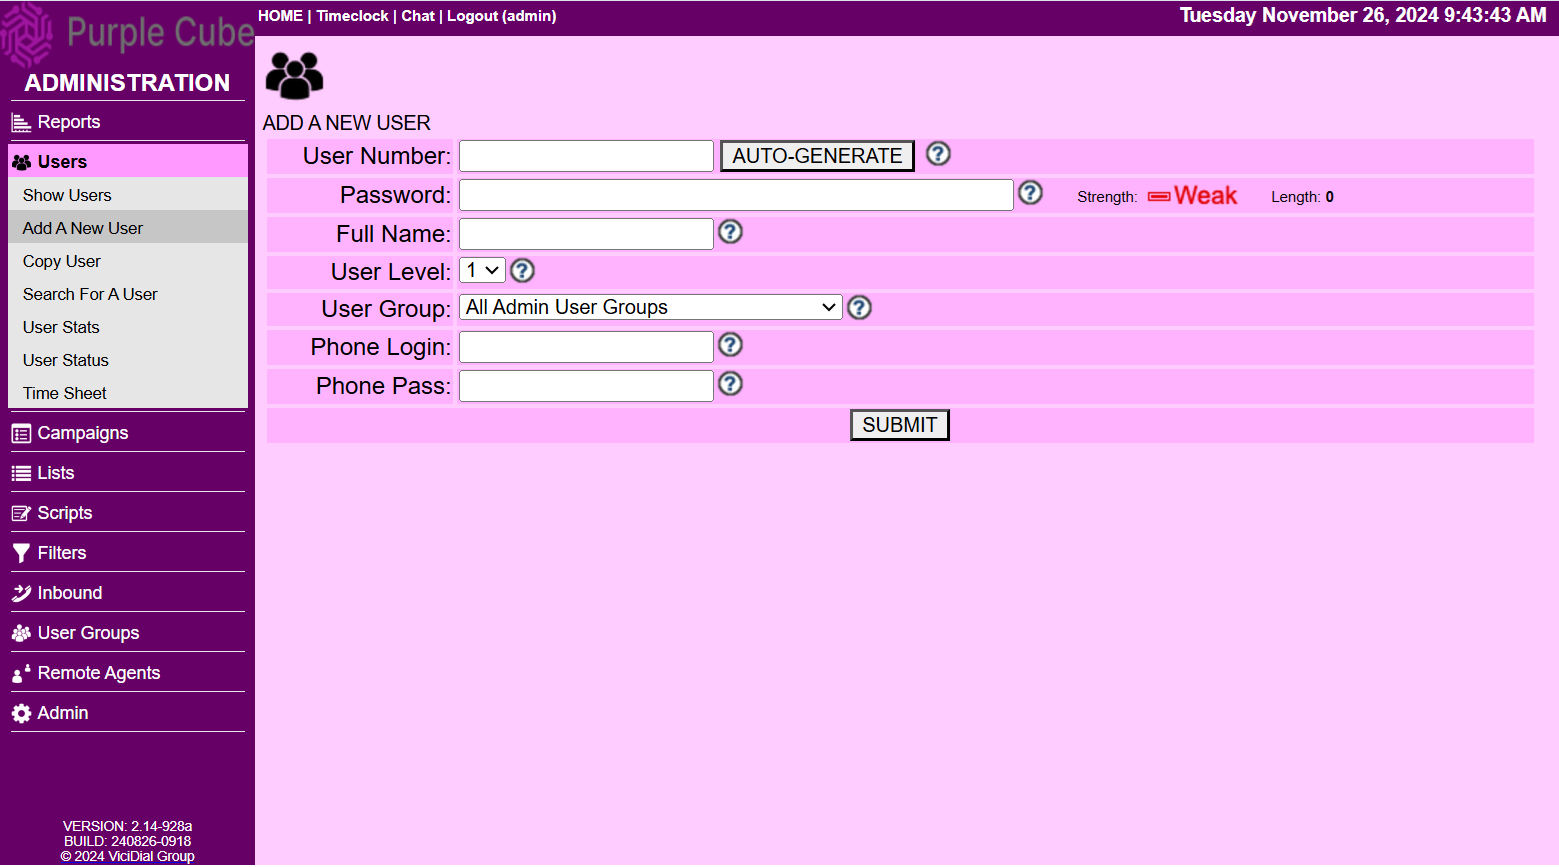
3. The Add A New User page will appear, prompting the following fields for input:
- User ID: Enter a unique user ID (220 characters). To ensure reporting accuracy, avoid reusing user accounts.
- Password: The password must be between 2 and 100 characters, containing only letters and numbers.
- Full Name: Enter the user's full name, with a minimum of 2 characters.
- User Level: Select the user level, which determines access permissions ranging from 1 to 9 (i.e., lowest to highest).
- Level 1: Access to the agent screen.
- Level 3 and above: Access as a closer.
- Level 7: Report access only.
- Level 8 and above: Admin web access; can edit users at Level 7 and below
- User Group: Assign the user to a group, controlling the accessibility of agent screen features
- Phone Login: This field auto populates with the default phone login during the agent login process.
- Phone Pass: Set a default phone pass for the agent login screen.
4. Click SUBMIT

5. Upon adding, the Modify a User Record page will be displayed, showcasing the newly added content along with additional sections for data entry, including:
- Agent Interface Options
- Admin Report Options
- Admin Interface Options
- Security Options (Enable only if necessary)
- API User Options (Enable only if necessary)
- Disable Admin and Agent Screen Options
- Level 9 Admin Options
6. Click SUBMIT
NOTE:
→ To add a new user by Copying an existing User, Please READ
→ To Search for an existing User, Please READ
→ To View stats for an existing User, Please READ
→ To View status for an existing User, Please READ
→ To View timesheet for an existing User, Please READ
Did this article help?